
How Often Should You Water Cannabis Plants? A Beginner Guide
Watering cannabis plants is about reading the soil, pot, and plant, not following a fixed schedule. Here’s a simple beginner guide.

Free shipping by country & method *Free delivery over 60€ applies to most EU countries. Shipping conditions may vary by destination.
Login
Register


Growing your own weed is one of those things that sounds easier than it is, until you figure it out. And when you do, it’s magic. You control the strain, the quality, and the final cure. But with that control comes responsibility… and a few annoying plant killers you’ll need to get familiar with fast: bud rot, mold, and root rot.
These are the big three threats that can quietly wreck your harvest if you don’t catch them early. Every grower has dealt with at least one of them, including us. So here’s a collection of tips and tricks we have learned from experience to help you on your journey.
Understanding Bud Rot in Cannabis
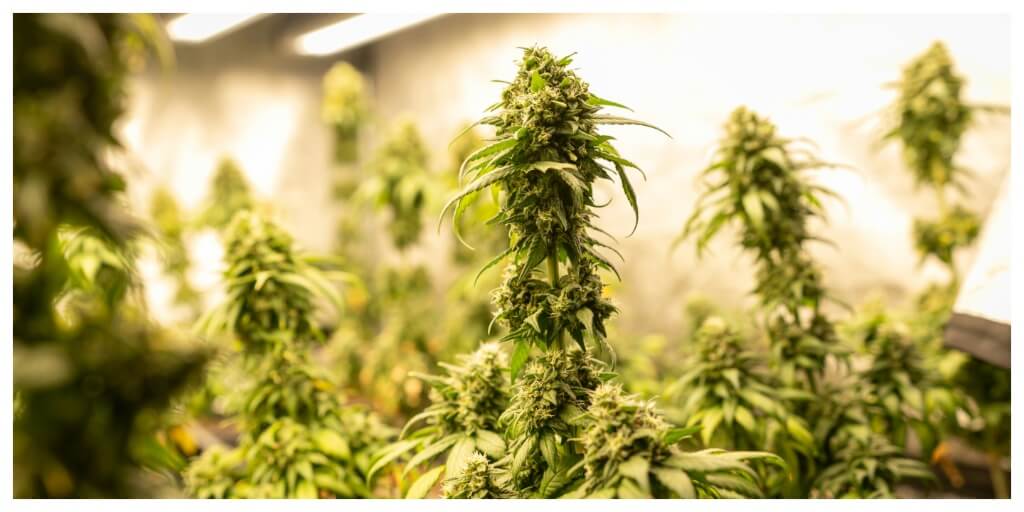
Bud rot (technically Botrytis cinerea) is a type of mold that sneaks into your plant during flowering, when your buds are fat, sticky, and vulnerable. It thrives in humid conditions and starts deep inside the nug, turning dense flowers into soft, brown mush from the inside out.
You won’t always see it coming. In fact, a plant can look healthy from the outside while rotting from the core. That’s why learning to spot subtle signs early is key.
At first, rot can look like faint white fuzz near the stem of the bud. If left alone, it quickly spreads and darkens to gray, then black. The affected bud will feel wet, soft, and stringy when pulled apart, definitely not what you want to see.
Your nose will also give it away. A moldy, musty smell that’s out of place is often the first red flag.
Moisture is the enemy here, especially when paired with poor airflow. Bud rot is most common in:
Genetics play a role too. Some strains are just more susceptible due to bud structure or lower resistance to mold.
Absolutely. Bud rot spreads through spores that travel invisibly through the air. If one part of the plant has it, chances are others might soon. If you’re not checking regularly, you may miss hidden pockets where it’s already taken hold.
The best move is always prevention. Don’t overcrowd your grow space. Make sure your canopy gets plenty of airflow, trim where needed. Keep humidity low during flowering (ideally under 50%), and don’t let rain-soaked outdoor plants go unchecked.
Once bud rot sets in, there’s no reversing it. Cut away the infected areas completely, and do it fast, before it spreads. Sanitize your tools and keep a close eye on the rest of the plant. Prevention always beats having to chop up your buds later.
At Red Eye Monkey, we’ve learned that avoiding mold and bud rot is a matter of being proactive, not just reacting when you see it. Whether you’re working an outdoor plot or dialing in your indoor tent, prevention takes planning, airflow, and attention to detail every step of the way.
Here’s how we keep our grow clean from seed to cure.
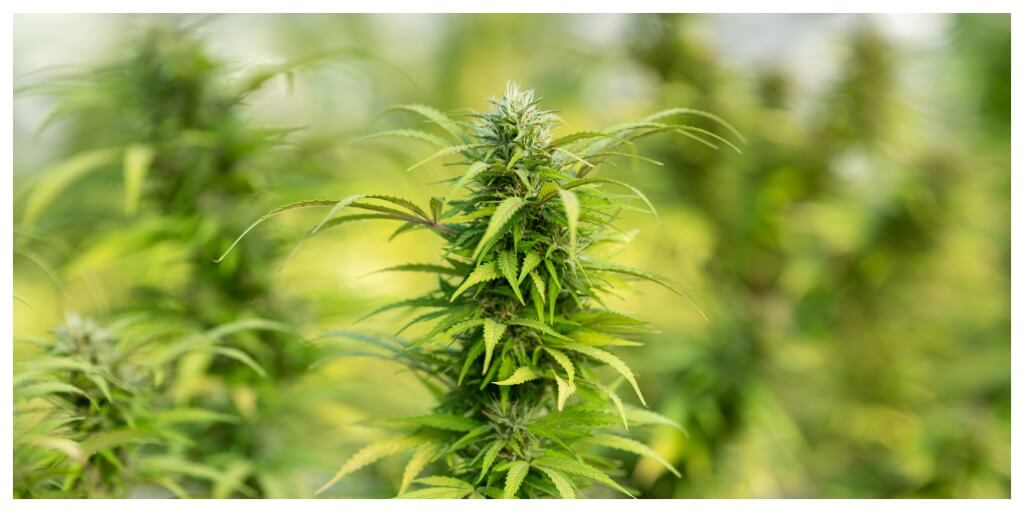
Choosing the right strain can give you a huge edge. Sativa-dominant genetics tend to handle humidity better than Indicas, mainly because their buds are looser and allow for better airflow. Indica plants, while great for density, often trap moisture, making them more vulnerable to rot when conditions get sticky.
Spacing is critical. Crowded plants don’t just block light, they also choke out air circulation, making the perfect environment for mold spores to thrive. Always leave enough room between each plant, and don’t be afraid to thin things out if your growing space gets too crowded.
Dampness is another big trigger. Overwatering, especially in already humid conditions, ramps up the risk. If you notice rot developing on any colas, act fast: remove the damaged buds, and if it’s late in the season, consider harvesting the healthy ones early to save your crop.
We’ve also had success using trellising to spread out plants and let the airflow work for us. A simple wooden trellis does the trick, and you can either build it yourself or grab one from the local garden center. The more space you give your branches, the less moisture gets trapped in your bush.
Indoor setups give you more control, but they’re not immune to mold. In fact, without proper ventilation, it can sneak up even faster. Make sure your fans are moving air through the entire grow space, not just over the tops. Clip fan leaves where needed and keep the RH (relative humidity) under 50% during flowering.
Mold doesn’t stop once the plant’s cut. Drying is one of the most sensitive stages. Your drying space should be dark, well-ventilated, and kept between 65-70°F with 50-55% humidity. If humidity spikes, run a dehumidifier. If it’s hot, kick on an AC. Rushing this stage is a shortcut to ruined buds.
It usually takes 10-14 days for buds to dry fully. They should feel dry to the touch, with stems that snap, not bend. If they’re still too soft, give them more time before moving to cure.
Once dry, it’s time to cure. This is where things can really go south if you’re not careful. Store your buds in airtight glass jars, filled about two-thirds full to leave some breathing room. Keep them in the same cool, dry conditions mentioned above.
For the first two weeks, burp the jars once a day – open them briefly to exchange the air and shake the buds gently to prevent clumping. This little habit goes a long way in keeping mold out and quality high.
If you find any signs of mold or bud rot, don’t mess around. Cut out every affected area immediately. Check the rest of the plant with care, and if you’re unsure, it’s better to lose one plant than risk your entire harvest.
With cured buds, mold is easy to spot, it shows up when you break them open. Toss anything suspicious, wash your hands, sterilize the jars, and wipe down your tools. Contamination spreads fast, and clean tools make all the difference during trimming and storage.
Here’s the deal: bud rot won’t necessarily send you to the ER, but it can absolutely mess up your product, and it’s not something you want to breathe in or consume.
At Red Eye Monkey, if we see signs of mold, we treat it like a quarantine situation. That bud’s no longer smokable, and keeping it around risks contaminating the rest of the stash.
Yeah, they can. While it’s not toxic in the traditional sense, mold spores can trigger respiratory problems, especially for people with asthma, allergies, or compromised immune systems. If you’re handling infected plants, wear a face mask, especially during trimming or disposal. And absolutely never smoke or ingest moldy weed. It’s just not worth the risk.
While bud rot attacks from above, root rot works underground, and by the time you notice something’s wrong, the damage is often well underway.
Bud rot is caused by airborne mold that targets flowers in warm, humid conditions. Root rot, on the other hand, is a fungal infection that attacks the root zone. Once the roots are compromised, they lose the ability to absorb water, oxygen, and nutrients. That means no energy, no growth, and eventually, no plant.
You can’t see the roots unless you’re growing hydroponically or you dig around, so you’ve got to watch the rest of the plant for early warning signs.
It’s definitely not something you want to see, but knowing what to look for can help you act fast. If the leaves starting to curl, droop, or yellow for no clear reason, branches beginning to sag and you’ve ruled out pests or pH issues, you might be dealing with root rot.
The clincher? The smell. If you disturb the soil and catch a sour, swampy odor, that’s root rot talking. By then, your plant’s already in trouble. But, if the damage isn’t too far gone, you might still save it.
In almost every case we’ve seen, too much moisture is the root (pun intended) of the problem.
Here’s what usually triggers it:
We’ve found that the best defense is a well-aerated, high-quality medium in a container that drains fast and doesn’t trap moisture. If your pots feel like swamps every time you water, your roots are likely drowning.
We’ve rescued more than a few plants at Red Eye Monkey that looked like goners, and root rot is one of those issues where fast action can make all the difference. If you catch it early, there’s a solid chance you can bring the plant back to life.
Young plants and seedlings are especially vulnerable to fungal issues in the root zone. But once you spot the symptoms, don’t waste time.
Start by gently removing the plant from its container or the ground. Strip away as much of the surrounding soil as possible, especially if it smells funky or feels too damp. That soil is likely contaminated.
If you’ve been growing in pots, toss the old soil and disinfect the container thoroughly. For the roots themselves, give them a quick soak in a mild fungicide or hydrogen peroxide solution. This helps kill off lingering spores.
Trim away any roots that are clearly brown, mushy, or dead, but take care not to over-handle the healthy parts. Roots are fragile and stressing them further can make things worse.
Once clean, replant the cannabis in fresh, well-draining soil. If you’re buying from a nursery or garden center, look for soil that’s specifically designed for good drainage and oxygen flow. That’ll set your plant up for a stronger recovery.
We’ve found that most cases of root rot come down to two things: poor soil choices and overwatering. But both of those are easy to fix if you follow some basic rules.
Use a growing medium that allows for both water retention and proper drainage. Aim for a pH level between 6.0 and 7.0, which keeps nutrient uptake in the sweet spot and discourages fungal growth.
Avoid pots that are too small for your plants. Tight quarters lead to crowded roots and poor airflow. The best containers are ones with good drainage holes and a runoff reservoir. You never want your plants sitting in still water.
One of the most common mistakes new growers make is giving their plants too much love, aka, too much water. Stick your finger in the soil before watering. If it still feels moist below the surface, wait. Let the top inch dry out.
A solid cannabis fertilizer can also help boost root health and overall plant immunity. Just don’t overdo it, burning your plants with nutrients can make them more susceptible to disease.
Drainage is non-negotiable. If your water isn’t draining fast enough, the roots are going to drown, and stagnant conditions create the perfect breeding ground for fungal infections. Good airflow + balanced watering = happy roots.
Keeping your root zone healthy will pay off all the way to harvest.
Growing your own cannabis is a rewarding experience, but only if you can keep your plants healthy from top to bottom. Bud rot and root rot are some of the most frustrating issues you’ll face, but with the right setup and a watchful eye, you can avoid most of the damage they bring.
We’ve seen firsthand how quickly a grow can turn sour without proper care. But we’ve also pulled off full saves with nothing more than a clean workspace, good airflow, and consistent routines.
Got questions? Red Eye Monkey’s always down to help you keep your crop thriving.
Watering cannabis plants is about reading the soil, pot, and plant, not following a fixed schedule. Here’s a simple beginner guide.
Ice hash, also called Ice-O-Lator or bubble hash, is a solventless cannabis concentrate made with ice, water, and filtration.
CBG flower is a non-intoxicating hemp flower known for its clear, light, and functional feel. Learn how it compares to CBD flower.